Music Production Tips and Tricks: How to Improve Performance Pt.1
Understanding Audio Buffers and Latency
Many modern synths are so powerful, the sound design possibilities are almost limitless!
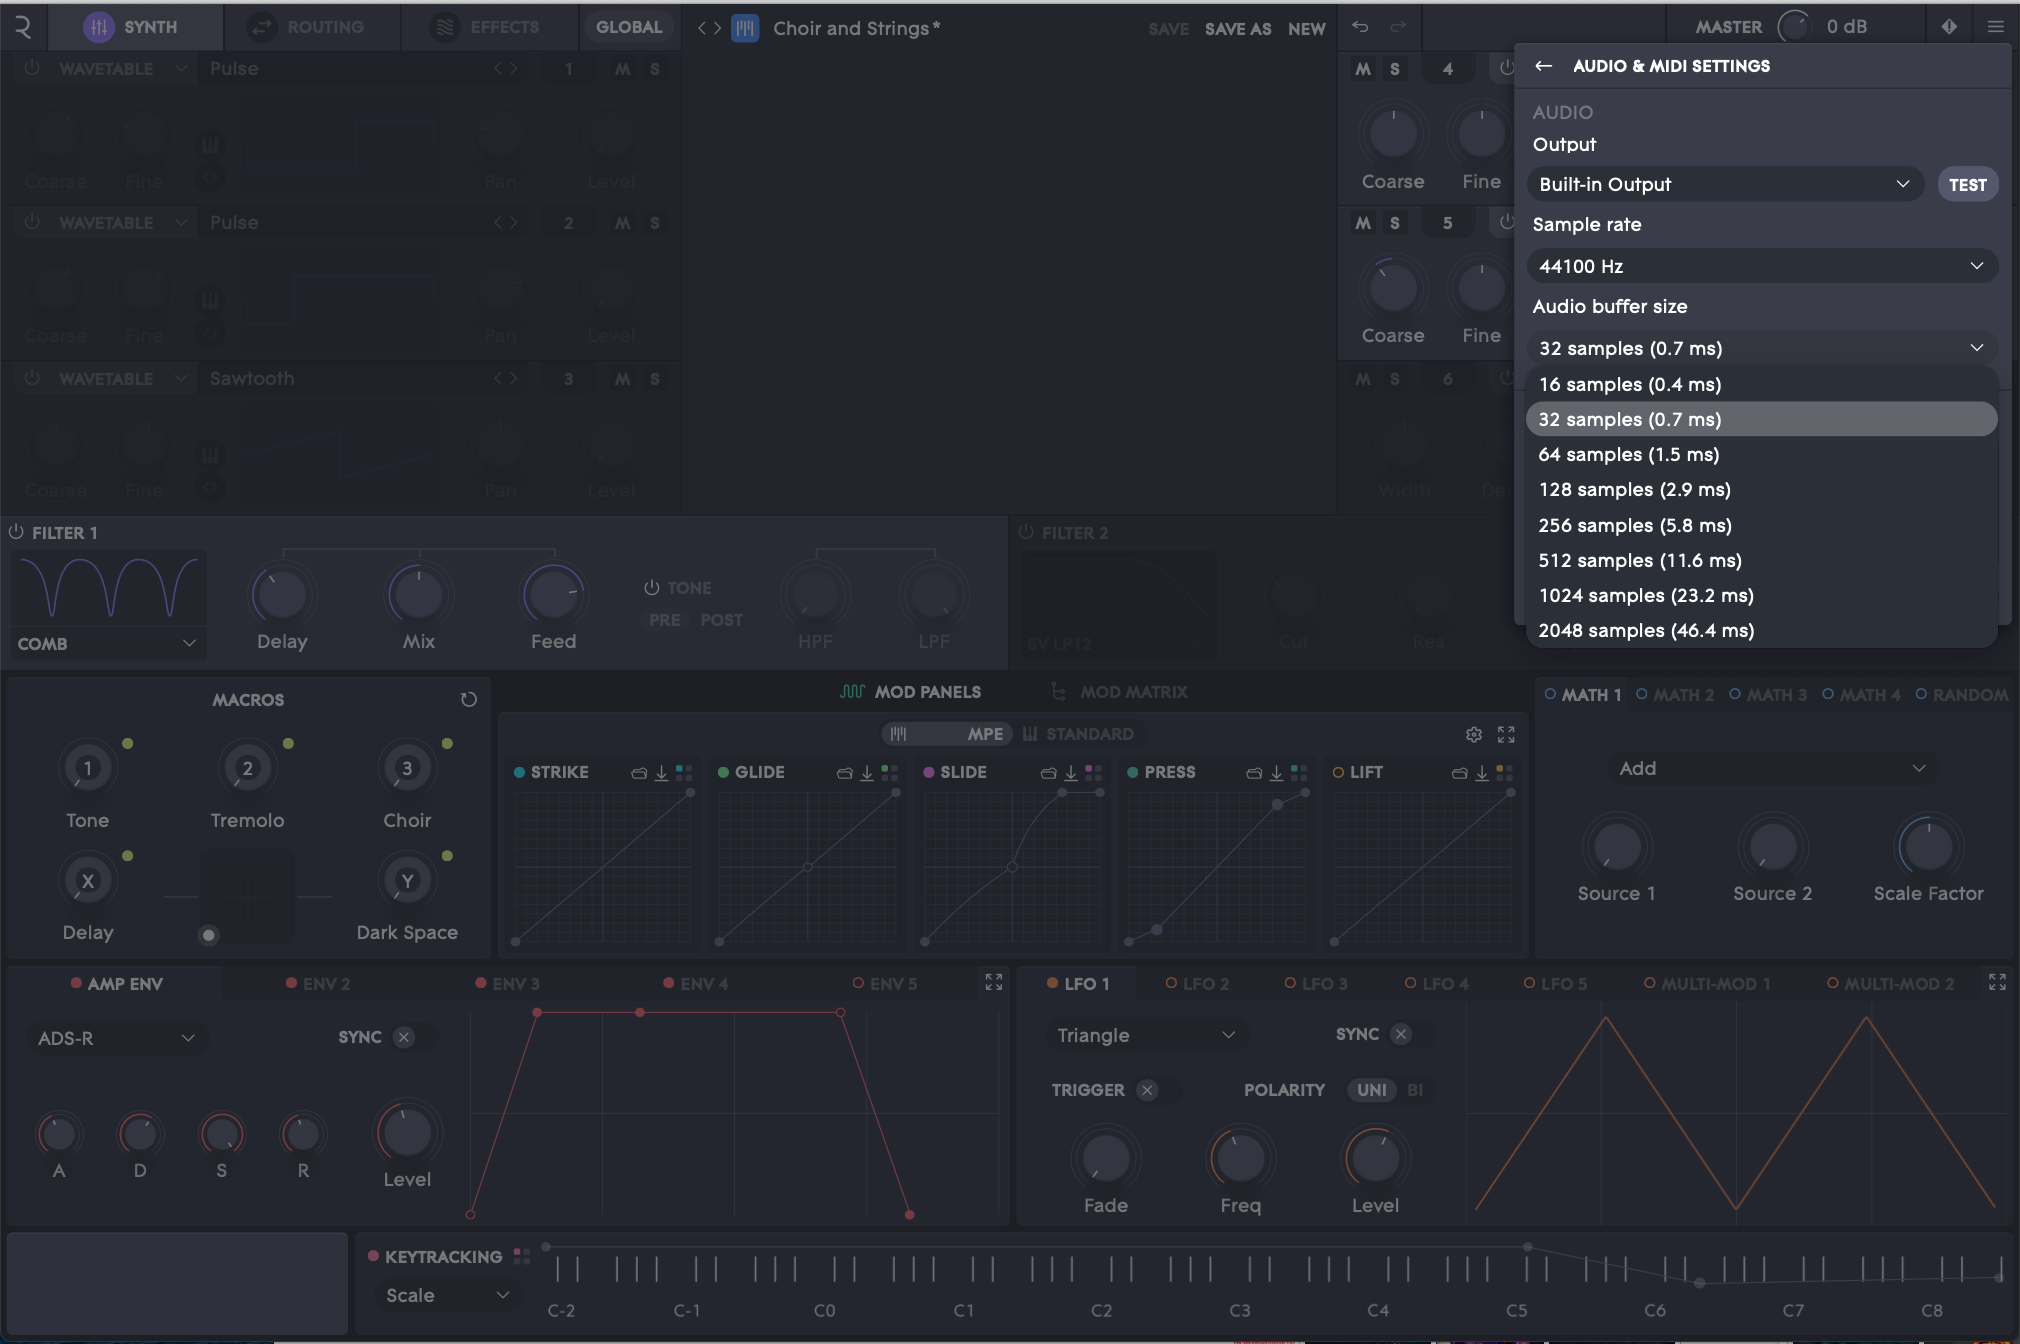
Take Equator2 for example — with up to 6 flexible sound sources and 15 premium effects that can be loaded into 12 slots, you have the option to craft almost any kind of sound. However, all these complex patches can be very intensive on older or lower spec devices.
But there’s no need to despair if you’re experiencing audio problems or latency while producing. We’ve put together some tips and tricks to help you optimize and improve the performance of your device, no matter what DAW or plugin you’re using.
In this first part we take a look at audio buffers, and why understanding them will make the process of making music much smoother. Check out part 2 for more tips and tricks.
Why are audio buffers necessary?
There’s a similar process when you’re recording audio, this time in reverse. The analog waveforms you record are converted by your audio interface into digital data, which is then sent on to your computer and stored.
Because playing and recording audio is complex, your computer cannot perform all the necessary conversions instantaneously — especially as it will be running other tasks and applications you might have open at the same time. So to maintain a constant stream of audio, we need to use audio buffers.
How do audio buffers work?
Audio buffers store chunks of audio data in your computer’s RAM. So audio buffers effectively determine how long your computer has to process any audio you hear. When buffers are working well, you won’t experience dropouts in sound, even if your computer is busy working on other tasks or applications.
Provided that your computer returns to audio processing at some point — effectively topping up your audio buffer — your soundcard can keep converting data into audio and vice versa.
A short buffer time forces your machine to try and process audio more quickly, so it’s more demanding. A longer buffer time is less demanding.
When should I adjust my audio buffer size?
But if the buffer size is too short for your computer to handle, you’ll hear pops and crackles when playing back audio. If you’re experiencing this while playing with patches from Equator2 — or any other synth — it’s time to adjust your buffer size!
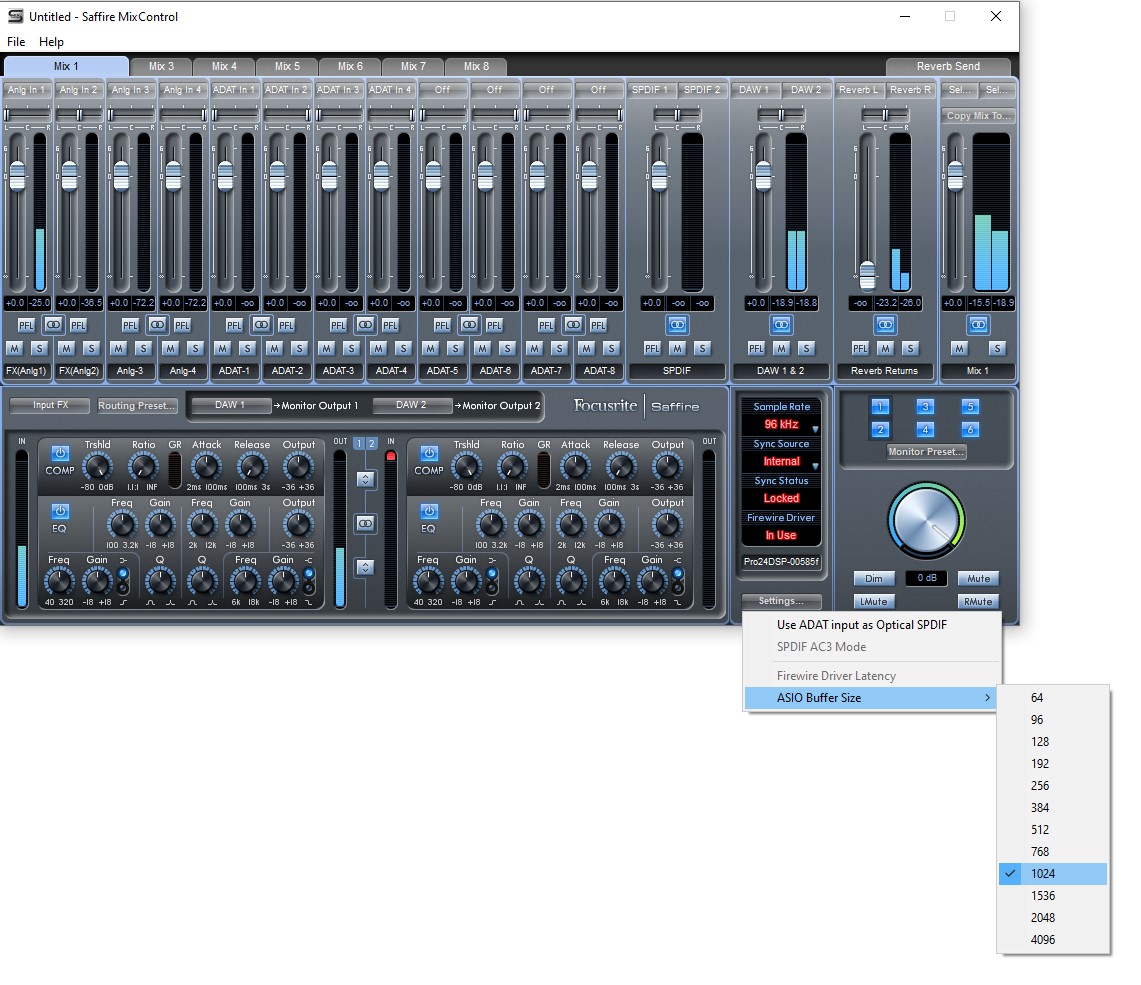
How do I adjust my buffer size?
Look for a setting called ‘Audio Buffer Size’ or similar in your DAW or Audio Interface preferences. Once you’ve found it, try increasing your buffer size incrementally until these pops and clicks disappear. Simply maxing out the buffer size would provide the best audio performance and lowest CPU load on your machine, but this would introduce significant latency. So keep experimenting until you find the best balance between playability and audio performance.
If you’re still hearing pops and crackles despite increasing your audio buffer size, don’t panic! Check out part 2 to learn some more ways to improve performance on your device.
Join the ROLI community